Recently added item(s)

Welcome to another Wacky Workshops project.
I love flower pens. It’s hard to be unhappy when you’re writing with something so pretty and they are loads of fun to make. I saw one in a shop years ago and figured I could do that and I have many times. It has always been a big hit during my classes as well.
So I figured it would be a must to make these for the flower themed birthday party I was hosting. Then I decided to incorporate them in a lolly bag with a difference. Stay tuned and I’ll tell all.
First the flower pen:
Supplies

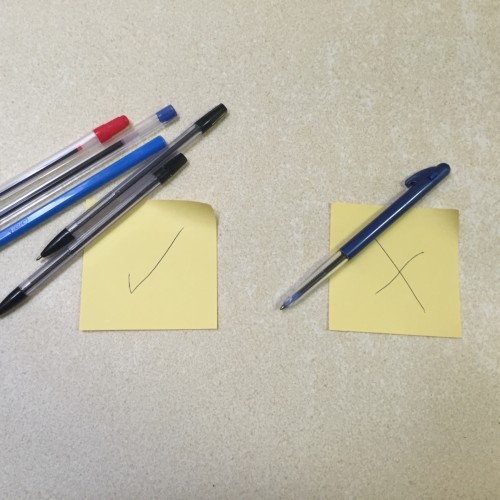
Artificial flowers (the ones from the cheap shop are fine), *pens, ribbon (thin is best), scissors, glue, decorations.
- Remove the base of the pen either by unscrewing or prying it off with a small knife, depending on the pen.
- Put a dot of glue near the nib of the pen to attach the ribbon. Once it is secure you can put a line of glue all the way along the pen and then start twirling the pen making sure the ribbon slightly overlaps itself as it winds around. Secure with another dot of glue.


- If the ink reservoir is sticking out from the bottom of the plastic casing, cut so it is flush with the end.
- Cut the stem off flower so it is 2 ½ – 5 cm (1-2 inches) long. Dip this in glue and insert into plastic pen casing so it is sitting right next to ink reservoir. Secure the top with another dot of glue, finish with ribbon if necessary.
- Test the pen to ensure the nib won’t move during writing.
- Add decorations: I’ve found that several strands of really thin different coloured ribbon look great and do not interfere with the pen’s function. I just tie them around the pen, just under the flower and secure with another dot of glue. However, you can also use beads, materials or whatever your imagination suggests.
*Ensure you have the right pens. The ones with the buttons will not work. It is also a great idea to test the pens to ensure they are working before you start the project – have learned this from experience.

These would be fun to make at Christmas to add to gifts. They would look good as part of the wrapping decorations.
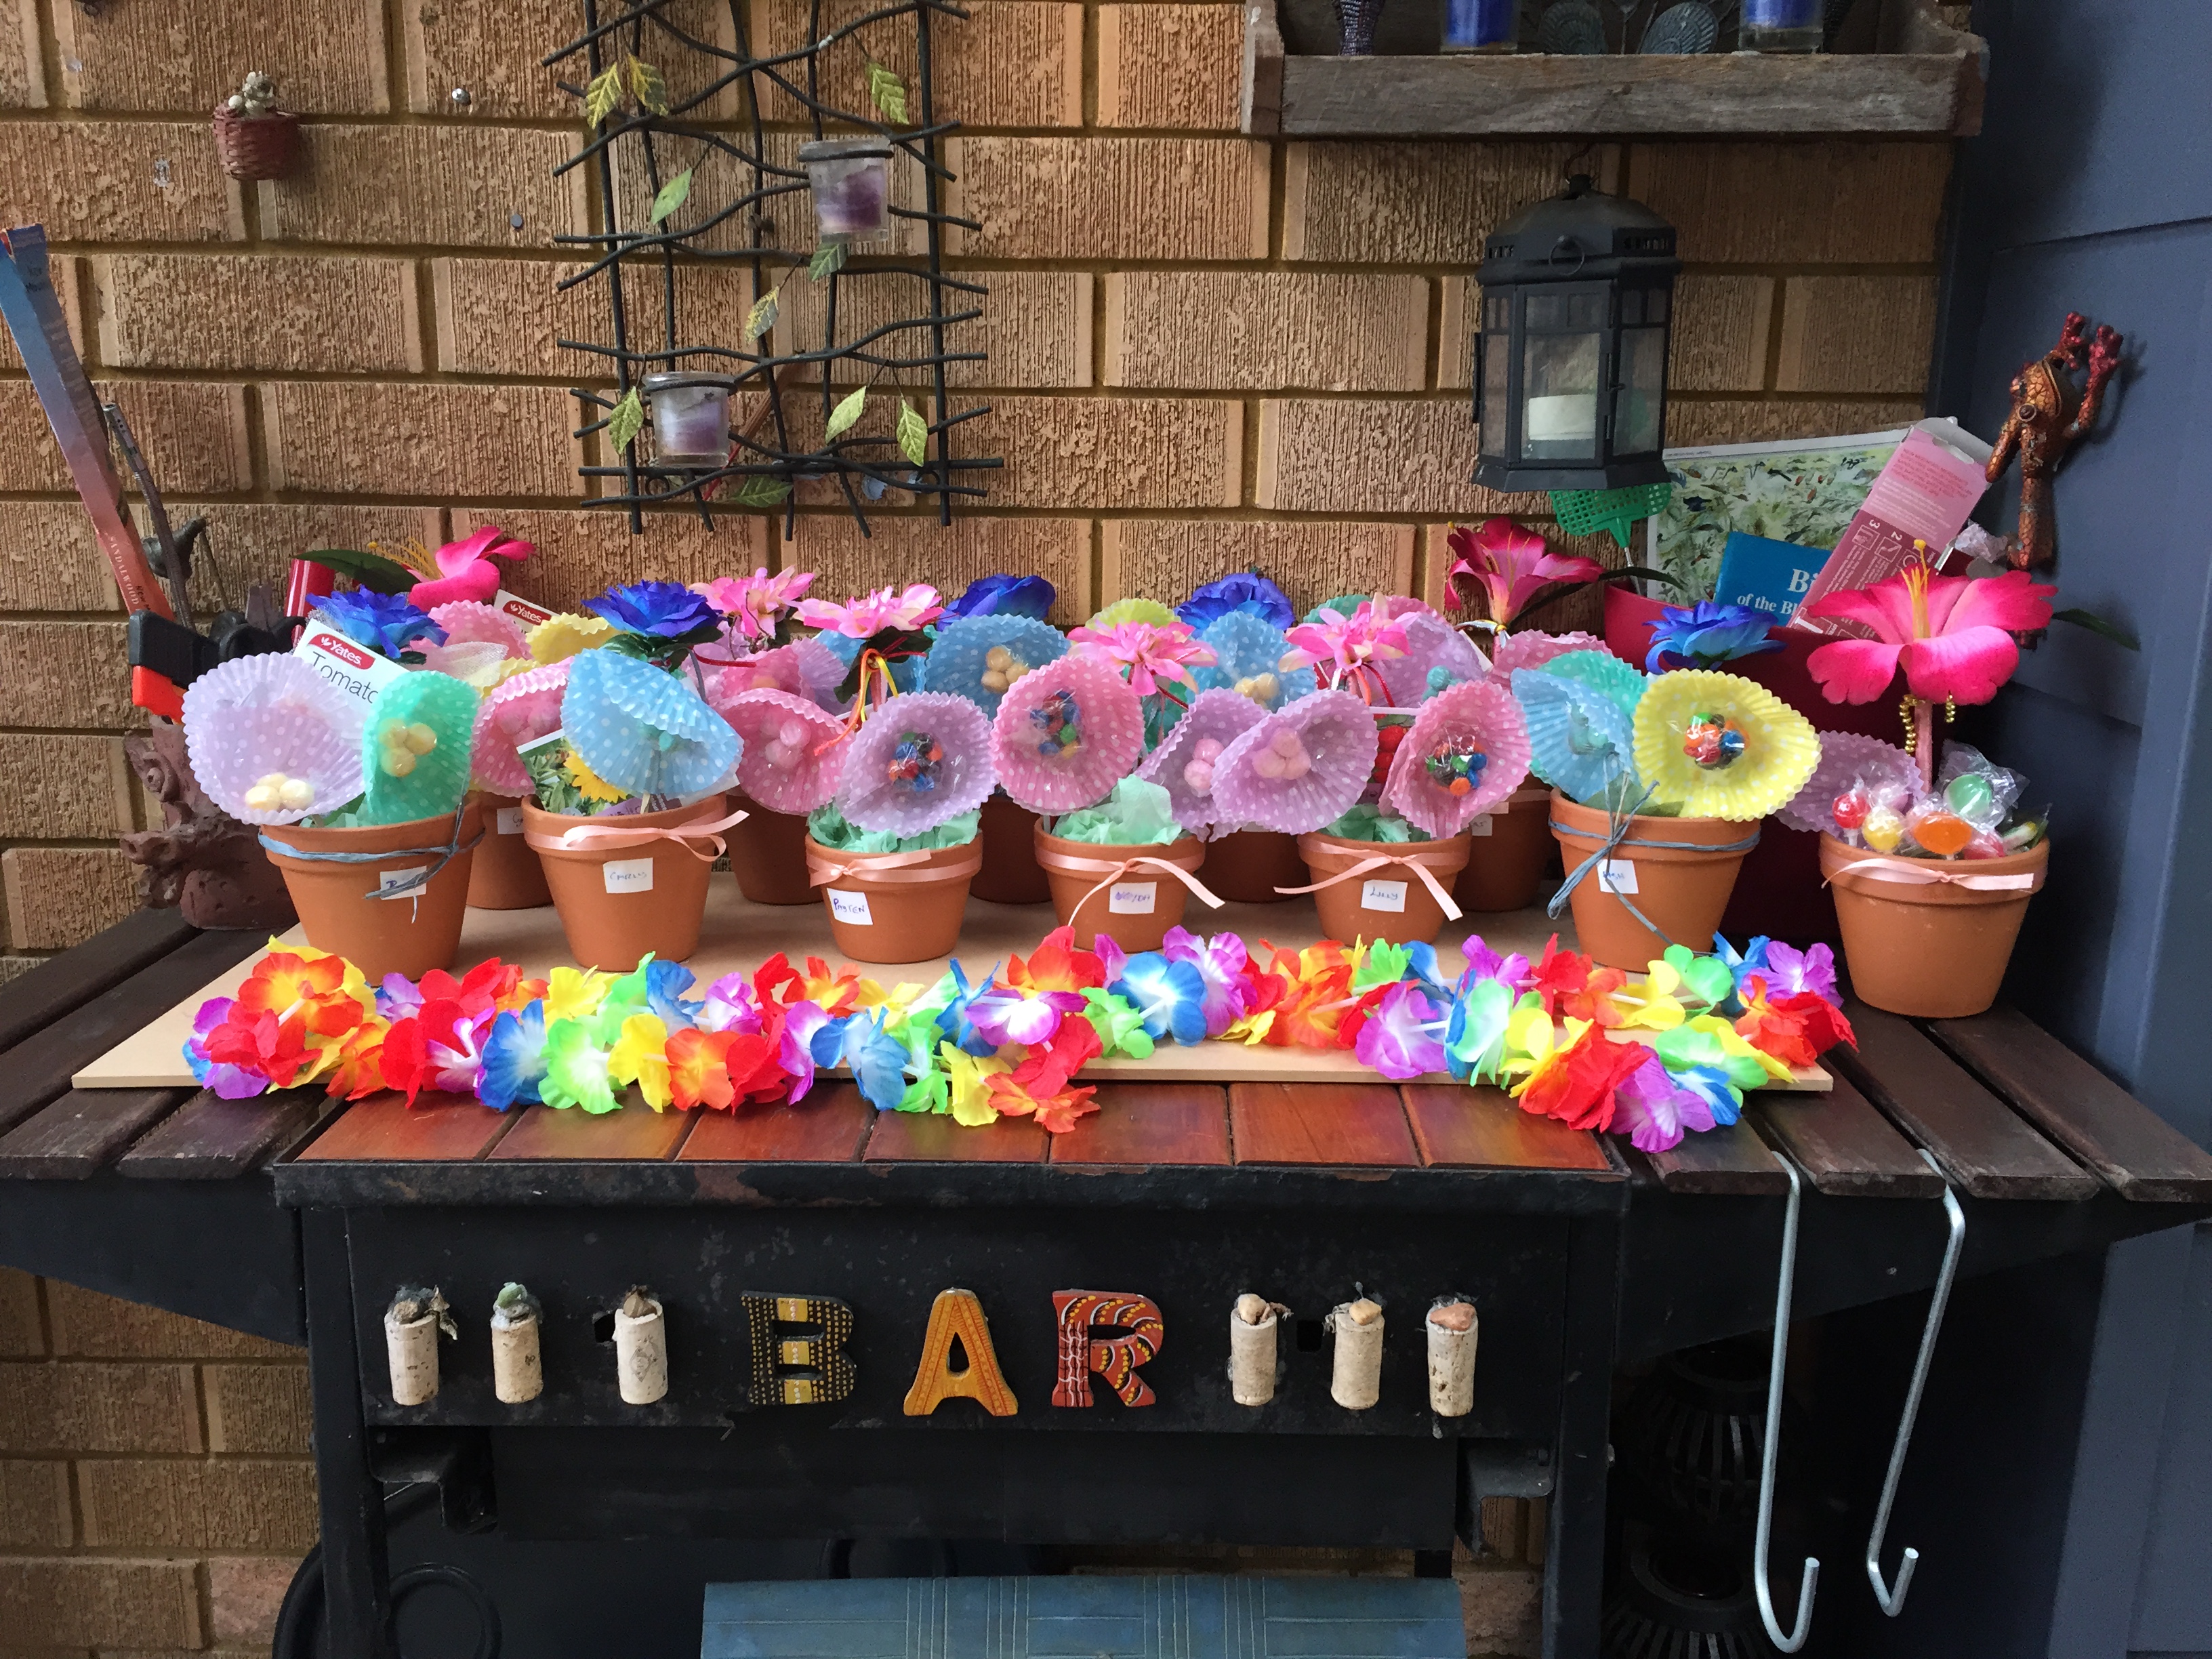
The Lolly ‘Bag’
I went out and bought 12 small terracotta pots (it’s surprising how inexpensive they are – I paid less than $1 each). I put some foam in the bottom of each (held in place with a bit of blu tak) then stuck the pen in the foam. For the lolly component, I glued half a wooden chopstick between two patty cake cases and stuck them in the foam. Then I wrapped a few lollies in glad wrap and stuck these in the middle of the patty cases to form the “stigma” – centre of the flower. Next, I put green paper around the foam to hide it, labelled the pots with names and added a ribbon and put a small packet of seeds in each pot.

If you enjoyed this craft be sure to follow me on Pinterest.
Happy crafting and have a gleeful week, Tamuria